Homelab - Why I built one for myself?

👋 I decided to build a homelab for myself!! 😁
Everything kicked off when I discovered the homelab subreddit. That was the spark. Being a DIY enthusiast, it was the only thing I could think about after that day.
I’ve been working on Kubernetes clusters for a while and recently got CKS and CKA certified.
Up until now, I used Docker Desktop and sometimes Multipass to spin up temporary clusters for practice — but never had something permanent.
The idea of having my own environment where I could break things freely and learn deeply just clicked.
It felt like the next logical step after experimenting with local clusters.
⚙️ Initial Setup
While learning and experimentation were the main goals, building a homelab would also free up resources from my work laptop (M1 MacBook Pro, 8GB, 256GB).
Running a K8s cluster alongside work-related containers was painfully slow.
My initial requirements were simple:
- At least 3 nodes — 1 control plane and 2 workers
- It shouldn’t cost much to build or run 24/7
- Should be simple enough to manage by myself
Based on these requirements, I procured the following machines. 🎉
🖥️ Machines
| Machine | Role | CPU | Cores / Threads | RAM | Storage | Notes | Cost |
|---|---|---|---|---|---|---|---|
| HP T640 (Unit A) | Control plane | 2 vCPU | 2C / 4T | 8 GB | 256 GB SSD | Primary control plane | INR 6000 ( $67 approx ) |
| HP T640 (Unit B) | Worker | 2 vCPU | 2C / 4T | 8 GB | 256 GB SSD | Worker node | INR 6000 ( $67 approx ) |
| Lenovo ThinkCentre M70q Gen 2 | Worker | Intel i5-11th Gen | 6C / 12T | 32 GB | 1 TB SSD | Main worker / heavier workloads | INR 23000 ( $260 ) |
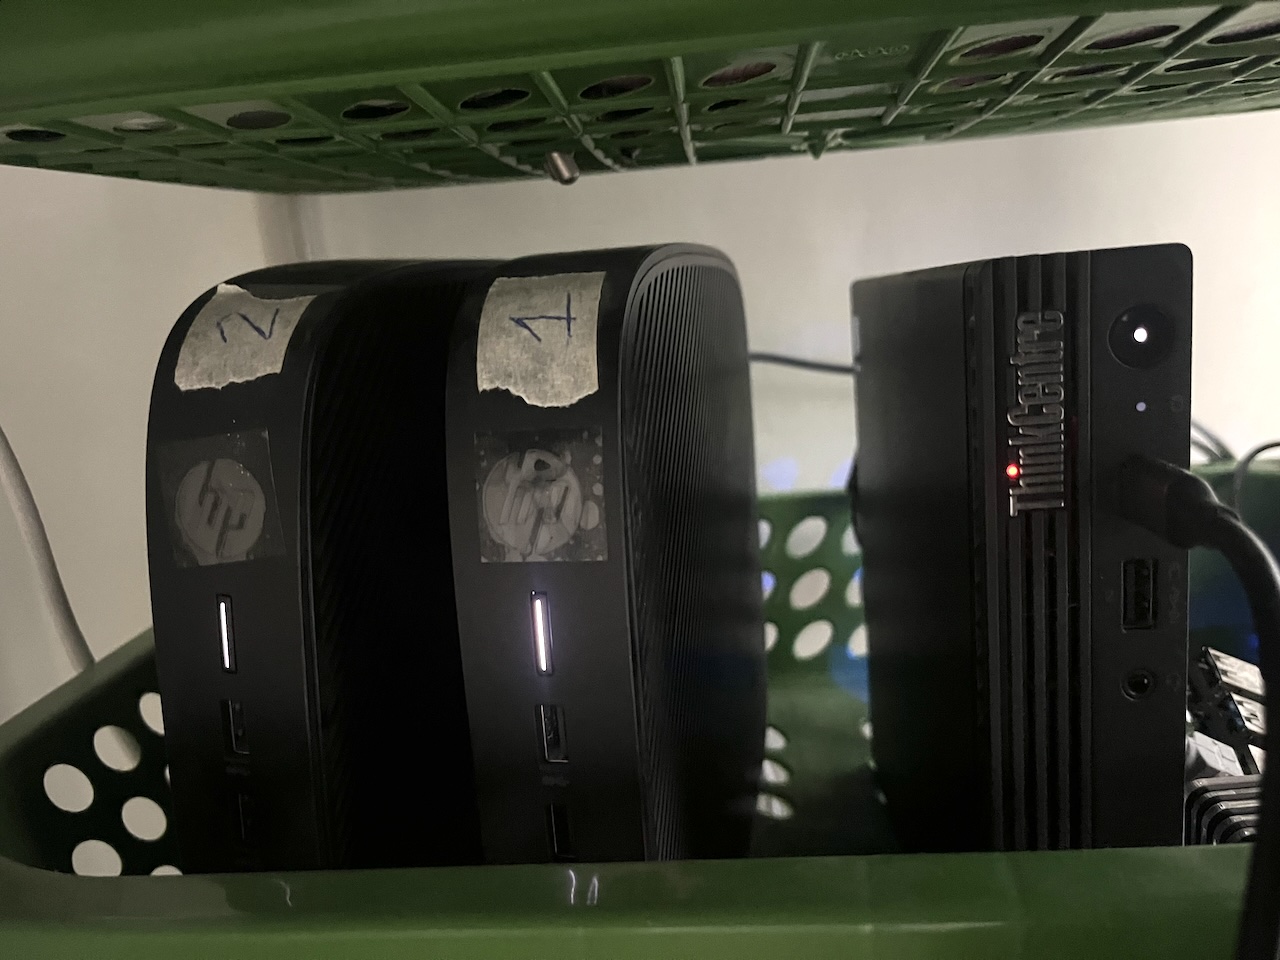
My current setup — compact, quiet, and efficient.
💡 Why Proxmox?
I had some ideas on what I wanted to do with this cluster — running home automation software, hosting Immich for family photo backups, and experimenting with AI agents and ML pipelines were a few of them.
But I realized I wouldn’t be using my setup to its full potential. And if I broke something (which I often do 😅), recovery would take forever.
That’s where Proxmox shines.
Instead of being limited to 3 physical nodes, I can have 7–8 virtual nodes running on top of them using Proxmox.
I can schedule backups, recover from failures quickly, and experiment freely — all while having a pleasant learning experience.
Also, it’s a great way to learn how to set up a mini datacenter from scratch.
In the meantime, I even moved my development from my laptop to one of the HP T640 nodes using VSCode Server, connecting via SSH to handle my daily workloads.
It’s been working great — stable, fast, and it freed up precious storage on my MacBook. 🚀
🧰 Proxmox Setup
After this, I was left with only two machines (1 HP T640 and Lenovo M70q), so I went ahead and installed Proxmox on both.
I created a cluster on the Lenovo mini PC (pve-large) and added the other node (pve-small) to it.
Now I can manage both nodes from a single interface — super convenient.
I also use Tailscale to securely access my work machine and Proxmox dashboard remotely.
Setting it up was surprisingly smooth — easily one of my favorite tools for safe remote access. 🔐
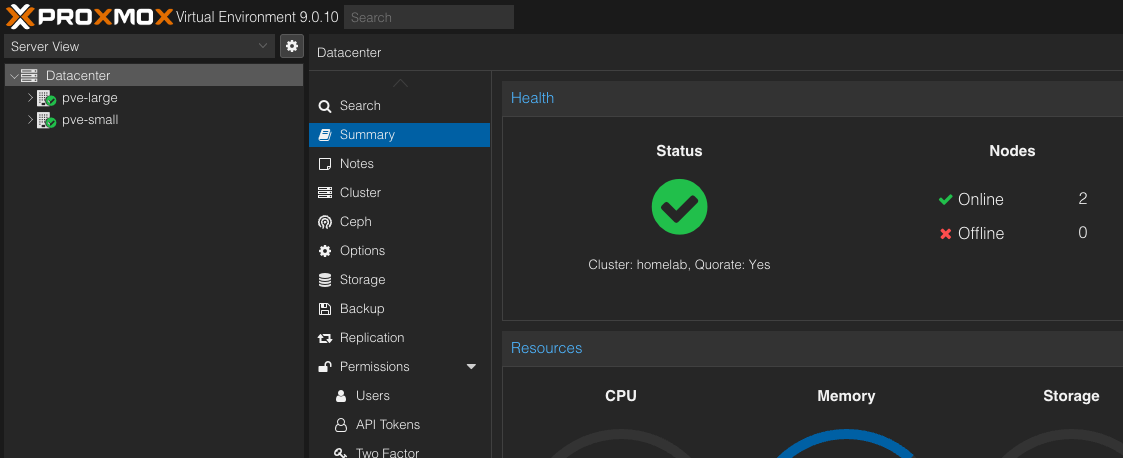
Proxmox cluster view — clean and functional.
🌐 Networking
All nodes are connected using a Gigabit Ethernet switch, and I assigned static IPs to each during setup.
With networking done, I finally had a solid base to start experimenting. ⚡
🧭 Conclusion
This setup gives me the flexibility to create VMs as needed and experiment without making major sacrifices.
I’ve got a lot of ideas to try next — from automating backups to testing AI workflows — and I’ll be sharing those as I go.
Looking back, I should have done this sooner.
It’s the perfect playground for learning, tinkering, and breaking things safely. 😄
This is just the beginning — and it’s going to grow over time.
I’ll keep updating this thread as my homelab evolves.
🚀 Next Steps
I have created a GitHub repo for my projects and experiments running in this setup.
Feel free to check it out, suggest improvements, or even replicate parts of it in your own lab.
See you guys on the next one. ✌️